The first step in creating a new label is to describe the label stock, or type of label being printed.
This software package contains over 1700 standard label stocks from the most popular label manufacturers. Choose one of these label stocks on which to create your label, or customize your own. There are several ways to create a label:
To create a new label from standard label stock:
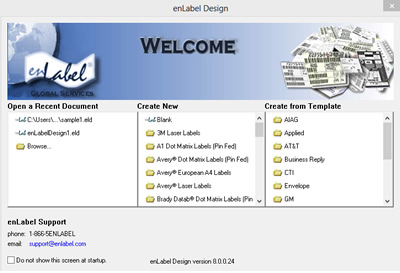
If the Login screen is visible, click . If the Welcome screen is not visible, choose .
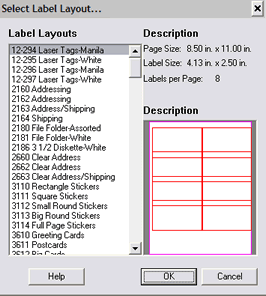
In the Create New column, double click on the appropriate type of label stock. The Select Label Layout window appears.
Scroll through the label layouts until you find the appropriate one.
NOTE: Notice that label and page dimensions appear in the top right section of the window and a preview of each label appears in the bottom right section of the window.
Click .
To create a new custom label format:
Make sure that wizards are enabled. Choose Preferences window appears. Select the General tab. Click to check the Enable wizards check box.
. TheChoose Login to enLabel window appears. Click The Page Properties wizard appears.
. The
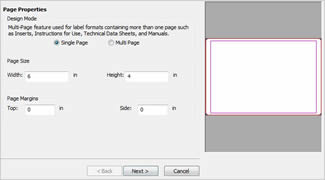
Specify whether you are designing one page or multiple pages of label templates by clicking on the appropriate box.
Enter the Page dimensions in the appropriate boxes.
Click . The Label Layout wizard appears.
Enter the number of labels per row and per column in the appropriate boxes, and select the label shape.
Click . The Layout Properties wizard appears.
Enter the horizontal and vertical distances from the edge of one label to the same edge on the next label in the appropriate boxes.
Check the Automatic Spacing box to distribute labels evenly throughout the page.
Click New Label Summary wizard appears.
.>The
Enter the name of your label layout in the Save Layout box.
Click ."Save Successful" appears under the layout name.
Click . A default document appears in the work area.
NOTE: To access the label format go to . Click the Predefined Labels tab. Highlight in the Brand box. The label is listed in the Name box.
To create a new custom label format without the wizard:
Make sure that wizards are disabled. Choose Preferences window appears. Select the General tab. If the Enable wizards box is checked uncheck it.
. TheChoose . A default document appears in the work area.
The Login to enLabel Workflow window appears. If your new label will be using information from a workflow database, fill in the information as follows. Otherwise, click .
Enter the enLabel web services server URL (consult your IT administrator for exact URL)
Enter your enLabel Workflow User Name.
Enter your enLabel Workflow Password.
Use the Select Group drop-down menu to select the appropriate group (Workflow, Execution, etc.)
Click
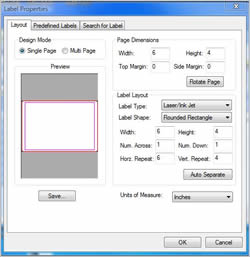
.Right click on the document and select The Label Properties window appears.
Specify whether you are designing one page or multiple pages of label templates by clicking on the appropriate box.
Enter the Page dimensions in the appropriate boxes.
Enter the label's type, shape, width, and height in the appropriate label layout boxes. Also specify the number of labels across and down the page, and the layout's Horizontal Repeat and Vertical Repeat.
NOTE: Click to have the system fill in the horizontal and vertical repeats.
Select the Unit of Measure from the Units of Measure drop-down list.
NOTE: Each time a label is opened it reverts to the default unit of measurement, which is inches.
Click .